Clearly, the lack of work outfit posts has continued - given that I was out sick at the end of the week, I have good reason! So, I decided now would be a good time for my first recipe post.
I'm sure most people have heard of [Pinterest] by now - it's a great resource of inspiration for crafts, food, style, and more. One of the first recipes I saw was for "Crash Hot Potatoes" - a delicious-looking take on small red potatoes. I did try these once before and they didn't turn out quite like I hoped, but that gave me a few ideas of how to make it better this time, and it worked! The initial recipe is from [The Pioneer Woman], and what you'll find here is my version. (Note: my version is less healthy, I'm sure...)
Crash Hot Potatoes: Michele's Parmesan, Garlic, and Dill Edition
You will need:
-Small/medium red potatoes
-Olive oil
-Salt and pepper (coarse-ground is best)
-Dill
-Butter
-Garlic powder
-Grated parmesan cheese
First, prepare the preparations. [Ludo reference... 10 points if you even know what I'm talking about.] There are extra herbs here because I didn't know what I wanted to use at first.
Next, boil your desired number of potatoes with the skins on. You will need to boil them until they are extremely tender, or the subsequent smashing step will not work out so well. (I learned this the first time.) I failed to keep track of how long I boiled mine, but a fork should go into them easily and the skin should be starting to split.
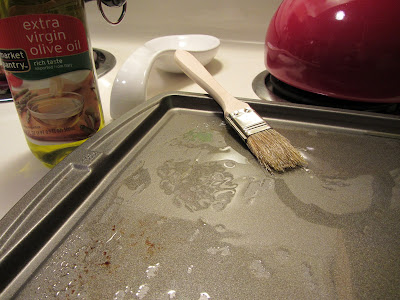
You'll want to prepare your pan by drizzling a good coating of olive oil. I'm sure Pam or something would work too, but I went with what the original recipe recommended. Meanwhile, melt some butter in a small dish. I used about half a stick. Also, preheat your oven to 450 degrees.
When the potatoes are done boiling, transfer them to the pan and SMASH THEM (gently) with a potato masher until they're somewhat flattened. This, unfortunately, is not as easy as it sounds and took me a few tries to get right. You want the potato to stay together, roughly. I started by smushing them gently, a little bit at a time, and rotating the potato masher with each smush. This broke apart the potatoes too much, however, so I found that if you score an "X" into the top of the potato (no more than halfway down the side), it helps them mash down more easily. I also removed a bit of extra skin off the top of each potato to give a rougher surface area for seasoning to stick to.
Once you've smushed your potatoes, brush a good amount of olive oil over the top of them. I also brushed a bit of melted butter on at this point. (High five, Paula Deen.) Next, generously salt and pepper each potato. I use the kind with the built-in grinders, so you get a good coarse-ground helping of each. Sprinkle on your herb of choice - I used dill this time. Place the pan in the oven and set the timer for 10 minutes. (Make sure the oven is good and hot - it's necessary to get these crispy enough.)
When one of my coworkers made these, she said they turned out too dry. With that in mind, I subbed in this next step to try to prevent that - more butter. This is why they're less healthy, of course. Mix some garlic salt in with the remainder of your melted butter. Take the potatoes out and drizzle/brush/dump/pour your garlic butter mixture over each potato. I also sprinkled on a generous helping of parmesan cheese at this point, then placed them back in the over for another 15 minutes (25 minutes total oven time).
When they come out, they should be nice and golden brown and sizzling, and your parmesan cheese should be forming a bit of a crust. Let them sit a few minute to finish crisping up, and also so you don't immediately torch your mouth like I did. There you have it!
They're a great side dish, or if you're like me and cooking for one... a meal. Serve with a dollop of sour cream, and you're done!
For next time, I might try to flatten the potatoes out a bit more for maximum overall crispiness (they were quite soft in the middle), and possibly add more garlic (the flavor was a bit too subtle) but I'm fairly happy with how they turned out! If anyone makes these or their own variation, let me know how they go!


No comments:
Post a Comment